Building My Father's Day Present -
Lego Technic, Fast & Furious - Dom's Dodge Charger
The Box Cover
The Parts Bags
The Instruction Book & Transfers Sheet.
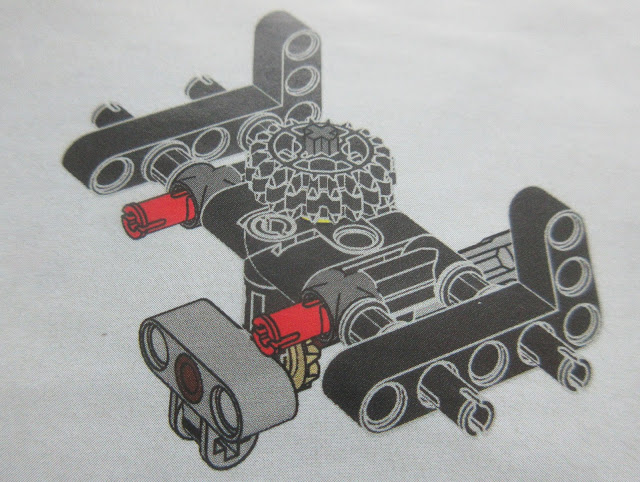
Building the Rear Axle & Diff.
Commencing the Chassis Construction.
Adding the Two Anti Tramp Rods.
Attaching the Rear Axle Assembly.
Adding the Rear Coil Over Dampers.
Preparing the Manual Steering Device.
The First Gear Wheel Added.
Adding the First Stage of the Steering Mechanism to the Chassis.
Preparing the Vehicle Lift Device in the Chassis.
The Lift Mechanism Added and the Drive Shaft Extended.
Extending the Steering Mechanism Gearings.
Completed Section from the Top.
From the Front.
From the Rear.
From Underneath Rear.
Building the Front Axle and Steering Rack Assembly.
The Steering Rack & Swivel Joints.
The Suspension Arms Fitted.
Assembling the Car Lifting Lever.
The Lift and Suspension Assembly added to the Chassis.
Adding the Exhaust Pipes.
Building the V8 Engine.
Linking the Cylinders.
Assembling the Crank Shaft & Connecting Rods.
Adding the Pistons.
Building the 'V' Block Assembly.
Locking the 'V' and adding the Drive Gear.
Fitting the Engine Block into the Chassis.
Locking In the Rear of the Engine Block.
Completing the Locking In Process.
Extending the Exhaust Manifolds by Adding the Front Coil Over Dampers.
Assembling and Fitting the Drive Chain from 16 Links.
Fitting the Tyres to the Wheels and the Wheels to the Chassis.
The Completed Running Chassis raised on the Lifting Frame.
Building the Front Headlamp Frame.
The 4 Head Lamps Ready For Fitting.
Headlamps Fitted To The Frame.
The Grill Assembly with Transfer Fitted.
The Grill Fitted to The Head Lamp Unit.
The Headlamp Unit Fitted to the Chassis.
Assembling and Fitting the Front Wings.
The Left Front Wing Fitted.
The Right Front Wing Assembled & Fitted.
Completing The Front Grill Surround.
The Completed Surround Fitted.
Preparing the Steering Wheel.
Assembling the Supercharger.
Completing the Supercharger.
The Completed Supercharger fitted to the Engine Block.
Building and Fitting the Open Bonnet.
The Completed Bonnet Fitted.
Building and Fitting the Left Side Door and Sill.
The Completed Door & Sill Assembly ready for Fitting to the Chassis.
The Left Side Door Fitted.
The Right Side Door and Sill Assembly.
The Right Side Door Assembly Fitted.
Attaching the Door Hinge Mechanism.
Assembling the Drivers Seat.
Drivers Seat Fitted into the Body.
The Black Cog Used By The Owner to Steer The Finished Car.
Building the Rear Chassis Extension, Fuel Tanks and Rear Bumper.
Adding the Two Fuel Tanks.
The Twin Exhaust Pipes.
Adding the Bumper along with the Registration Plate Sticker.
Adding the Top Trim and Rear Lamps.
Adding the Extended Chassis to the Main Chassis.
Building the Cab Roof.
Fitting the First Middle Roof Section.
Forming and Fitting the Side Roof Seactions.
Assembling the Under Roof and Door Pillar Support (Also used to attach the Roll Over Cage frame) .
Assembling & Fitting the Roll Over Frame Side Struts.
The Side Struts Fitted.
Assembling & Fitting the Windscreen Side Struts.
Fabricating and Fitting the Opening Boot Lid.
Building the Right Side Rear Wing.
Adding the Under Wing Sections.
The Completed Right Side Wing Panel.
The Right Rear Side Panel Fitted.
Making and Adding the Right Side Door Stop.
The Door Stop In Place.
Assembling the Fire Extinguisher.
Fire Extinguisher In Its Place.
Fitting the Right Rear Side Sloping Trim.
The Trim Fitted.
The Rear Right Side Outer Trim.
The Trim Fitted.
Fitting the Left Side Rear Wing.
The Left Side Rear Wing Fitted.
Just the Two Grey Tubular Side Trims to Add and the Model is Finished.
Driver Side with Door Open.
The Boot Lid Open Revealing the Fuel Tanks.
The Raw Interior.
The Car Presented on Its Lifting Rig (Operated using the Lever Located Inside the Cab) .
With the Bonnet Up Revealing the Full Engine.
The Completed Fast & Furious Dodge Charger.
Frank...


No comments:
Post a Comment